Getting started for employees
This tutorial walks you through everything you need for your first week in the Employee Center — RezolveIT’s self-service portal for employees.
1. Sign in
Section titled “1. Sign in”- Open the sign-in page and enter the email and password your organization gave you. If your organization uses single sign-on, use the Google, Microsoft, Apple, or organization SSO button instead — you’ll be sent back once you’re authenticated.
- Prefer not to use a password? Switch to the email code tab and RezolveIT will send a one-time code to your inbox.
- Once you’re signed in, open the Employee Center — RezolveIT’s home for employee self-service.
2. Find your way around the home page
Section titled “2. Find your way around the home page”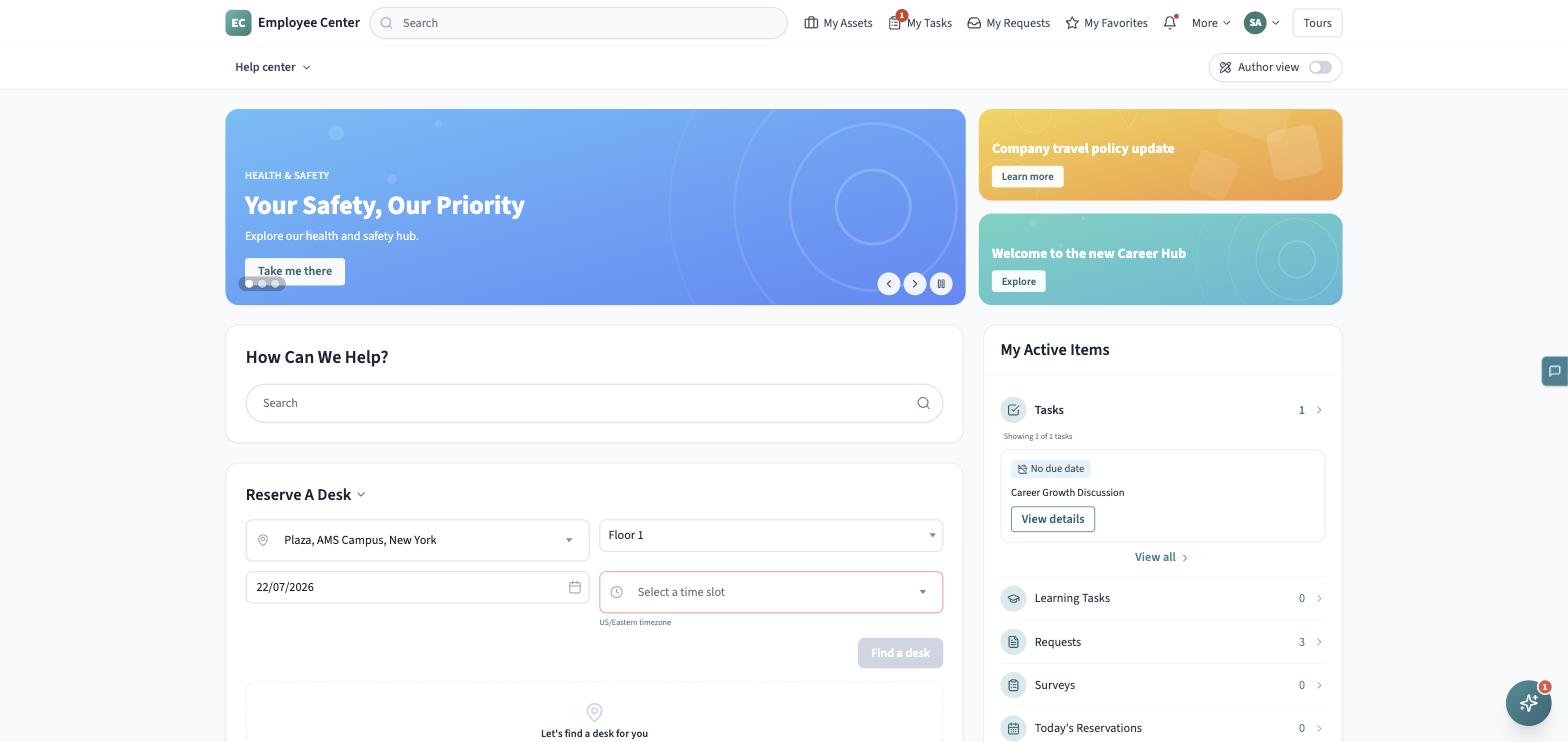
The Employee Center home is a grid of widgets you can personalize:
- At the top, a “How can we help?” search box — start typing and a dropdown suggests matching knowledge articles and destinations as you type.
- Below it, Quick Links — tiles linking to common destinations.
- Popular topics — a row of topic chips; click one to search for it.
- My active items — a running list of your open tasks, with a link through to the full list.
- Recommended for you — knowledge articles worth reading.
Along the top bar you’ll also find My Assets, My Tasks, My Requests, and My Favorites shortcuts, a notification bell, and your profile menu.
3. Request something from the catalog
Section titled “3. Request something from the catalog”- Use the top navigation categories (Human Resources, Technology Services, Workplace Services, and more) or the Popular topics chips to browse to a category.
- On the category page, browse the Support resources list — filter by All, Articles, or Requests, sort Popular or A-Z, or search within the category.
- Click a request card to open its form.
- Fill in the fields — required fields are marked with a red asterisk. Field types you’ll see include plain text, multi-line text, dropdowns, yes/no toggles, lookups (type to search for a person, location, or asset), dates, and file attachments.
- Click Submit. If anything’s missing or invalid, RezolveIT highlights it so you can fix it before resubmitting.
- On success you’ll see a confirmation screen with your request’s reference number.
See Requesting items for the full field-by-field walk-through.
4. Track it in My Items
Section titled “4. Track it in My Items”- Open My Requests (or My Tasks) from the top bar.
- Find your request in the list — each row shows its number, title, state (Open, In Progress, Pending, Fulfilled, or Closed), and stage.
- Click the number to open the record. You can view its details, follow the activity, and post a comment or attach a file.
See Tracking your items for what each state and stage means.
5. Find a knowledge article
Section titled “5. Find a knowledge article”- Open Knowledge from the Help center menu, or search from the home page search box.
- Browse articles grouped by knowledge base, or open one from your search results.
- On the article, use the Was this helpful? Yes/No buttons to leave quick feedback, and check the Related articles rail for more on the topic.
6. Ask the Virtual Assistant
Section titled “6. Ask the Virtual Assistant”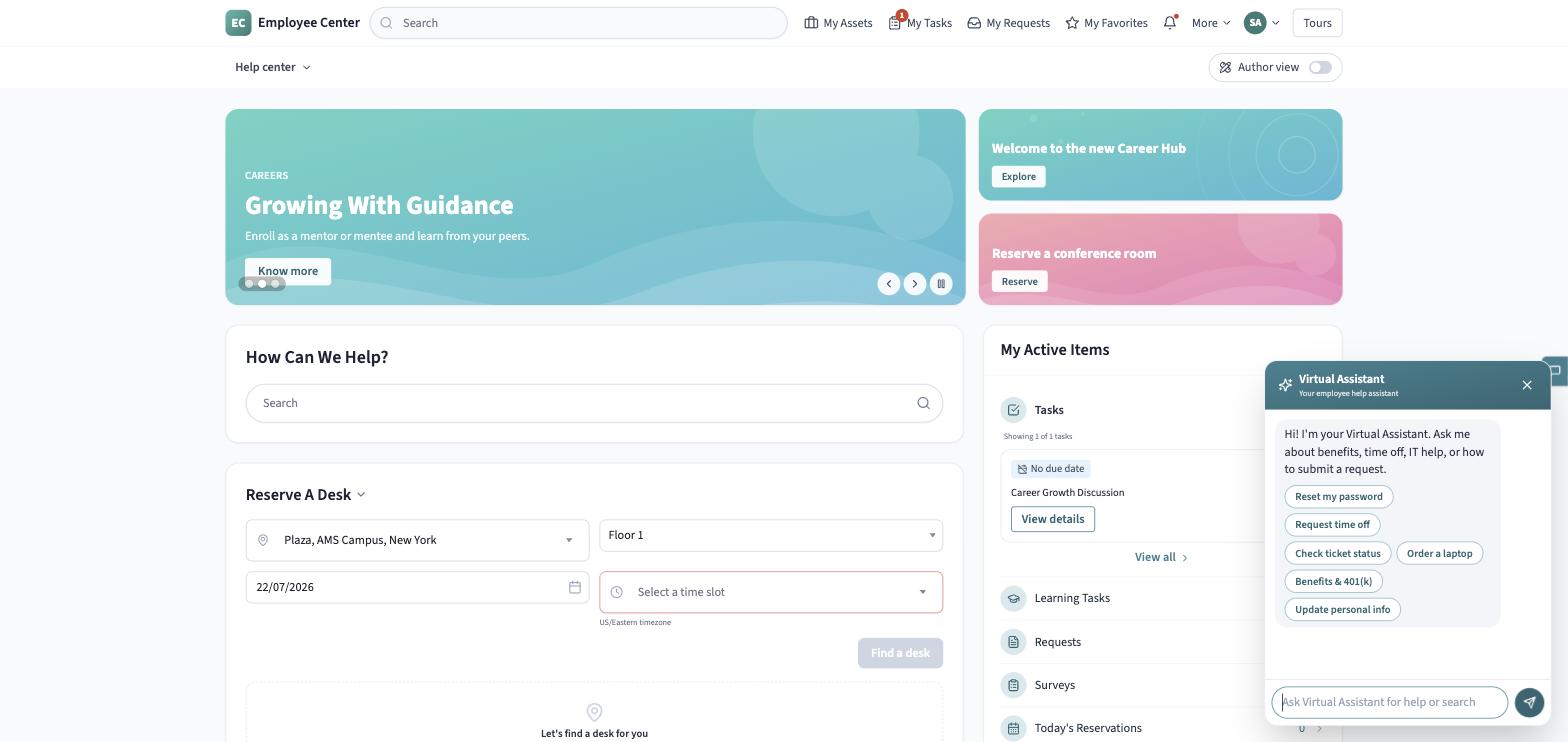
- Click the sparkle button in the bottom corner of any Employee Center page to open the Virtual Assistant.
- Type a question, or tap one of the suggested topic chips.
- Ask it to do something concrete — “I need a new laptop” or “request time off” — and it will offer to create the request for you; confirm and it hands you back a reference number and a link to the new record.
See The Virtual Assistant for more on what it can help with.