Employee essentials
The Employee Center is RezolveIT’s self-service portal — where you go to ask for something, check on something you already asked for, look something up, or approve a request waiting on you.
1. The Employee Center home
Section titled “1. The Employee Center home”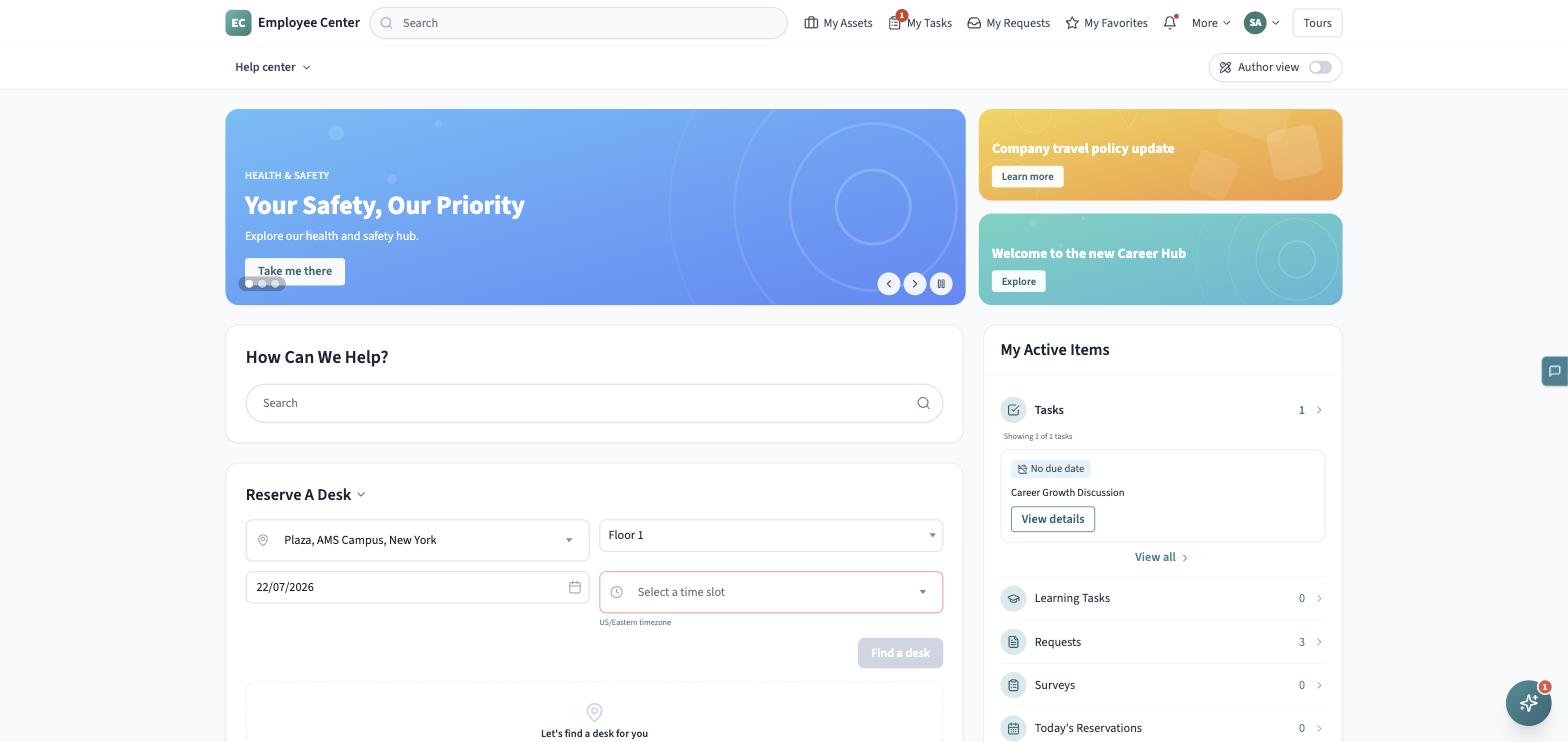
The home page is a grid of widgets you can personalize:
- A “How can we help?” search card at the top — start typing and a dropdown suggests matching knowledge articles and destinations before you even press Enter.
- Quick Links — tiles to common destinations.
- Popular topics — a row of chips; click one to run a search for it.
- My active items — your open tasks, with a link through to the full list.
- Recommended for you — knowledge articles worth reading.
Along the top bar you’ll also find My Assets, My Tasks, My Requests, and My Favorites shortcuts, a notification bell, and your avatar menu. Below the top bar, the Help center menu lists every service category — Human Resources, Technology Services, Workplace Services, Logistics Services, Health and Safety, Legal, Purchases and Expenses, Finance, Cloud Services, Company, and more.
2. Searching
Section titled “2. Searching”Type into the search box on the home page or the top bar. As you type, a dropdown groups matches under Knowledge (articles) and Catalog (destinations), so you can jump straight to what you need without opening a category first.
3. Requesting an item
Section titled “3. Requesting an item”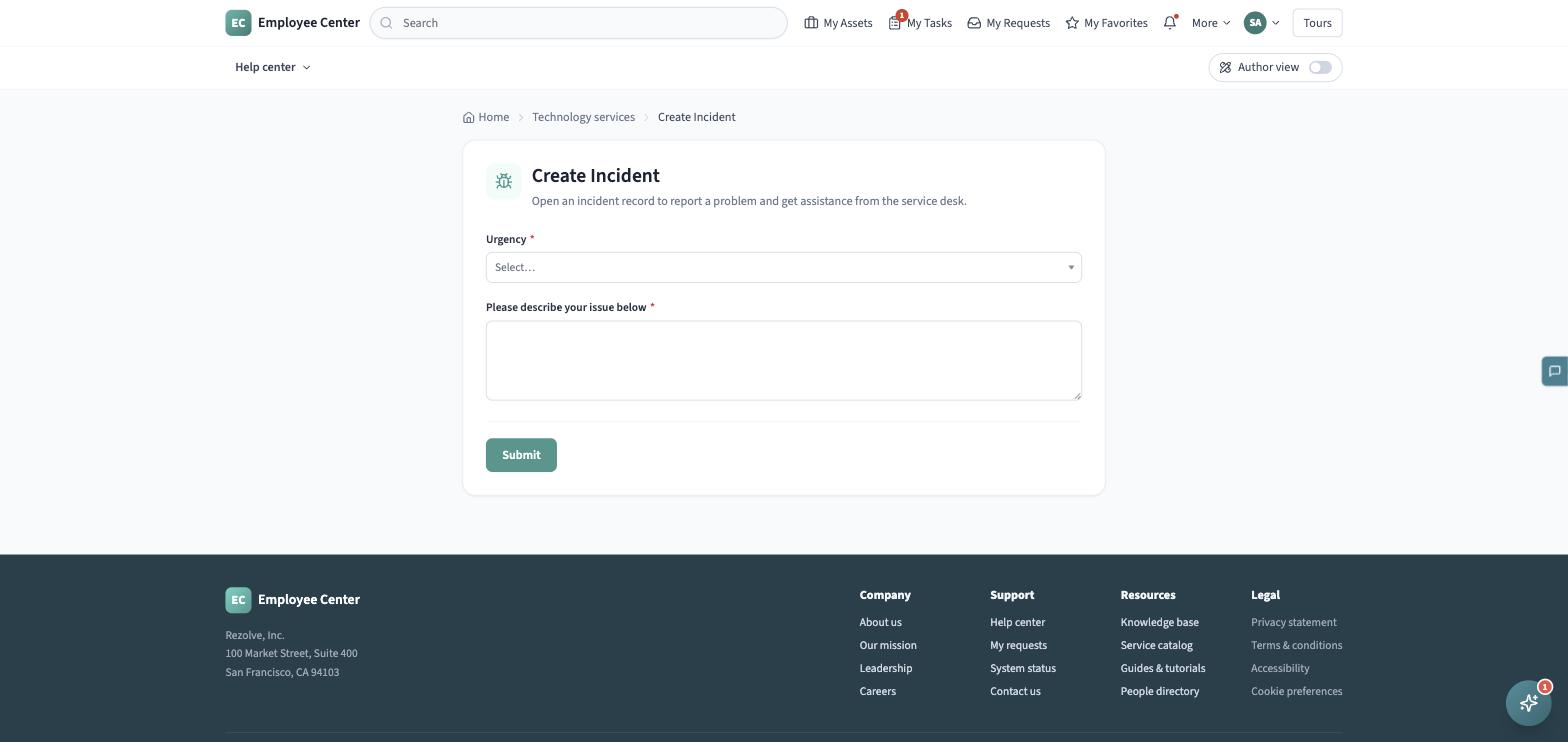
- Browse to a category from the Help center menu, a Quick Link, or a Popular topics chip.
- On the category page, browse the Support resources list — filter it to Requests only, sort Popular or A-Z, or search within the category.
- Click a request card to open its form.
- Fill in the fields. Each renders as the right control for its type: plain text and multi-line text, email (validated on submit), number and currency, a searchable dropdown, Yes/No or multiple-choice buttons, a lookup that searches related records (people, locations, companies, configuration items), date or date-time pickers, a list control for entering more than one value, a checkbox, and a drag-and-drop attachment area. Fields marked with a red asterisk are required.
- Click Submit. If anything’s missing or invalid, RezolveIT highlights every field that needs attention before anything is sent.
- On success you land on a confirmation screen with your request’s reference number.
See Requesting items for the complete field-by-field walk-through.
4. Tracking what you’ve asked for
Section titled “4. Tracking what you’ve asked for”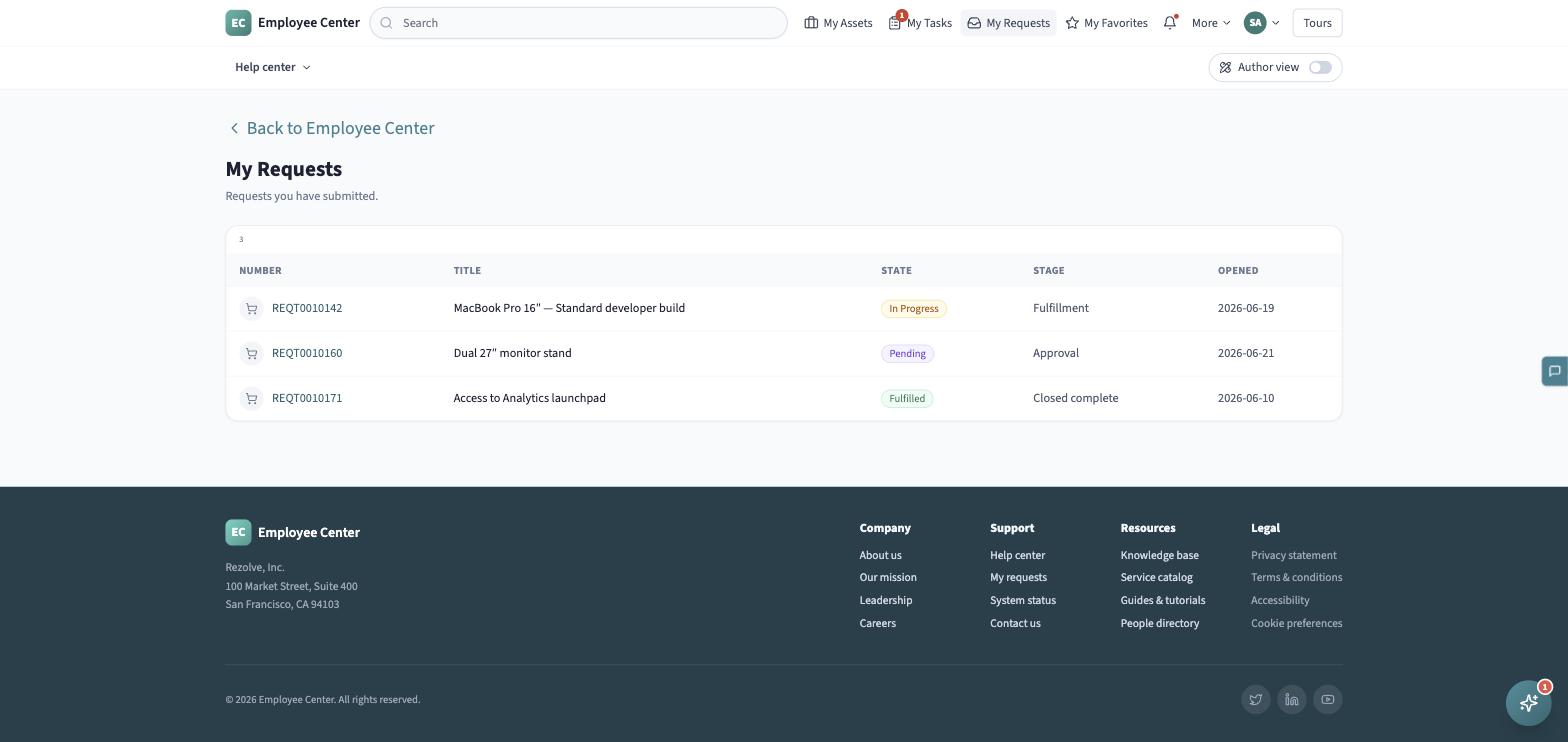
- Open My Requests, My Tasks, or My Assets from the top bar.
- Each is a table — My Requests shows number, title, state, stage, and when it was opened; My Tasks adds due date and priority; My Assets is read-only, showing what’s assigned to you.
- Click a row’s number to open the record, where you can review its fields, read the activity history, and post a comment or attach a file.
A request or task moves through Open, In Progress, Pending, Fulfilled, and Closed. See Tracking your items for what each one means.
5. Finding an answer in Knowledge
Section titled “5. Finding an answer in Knowledge”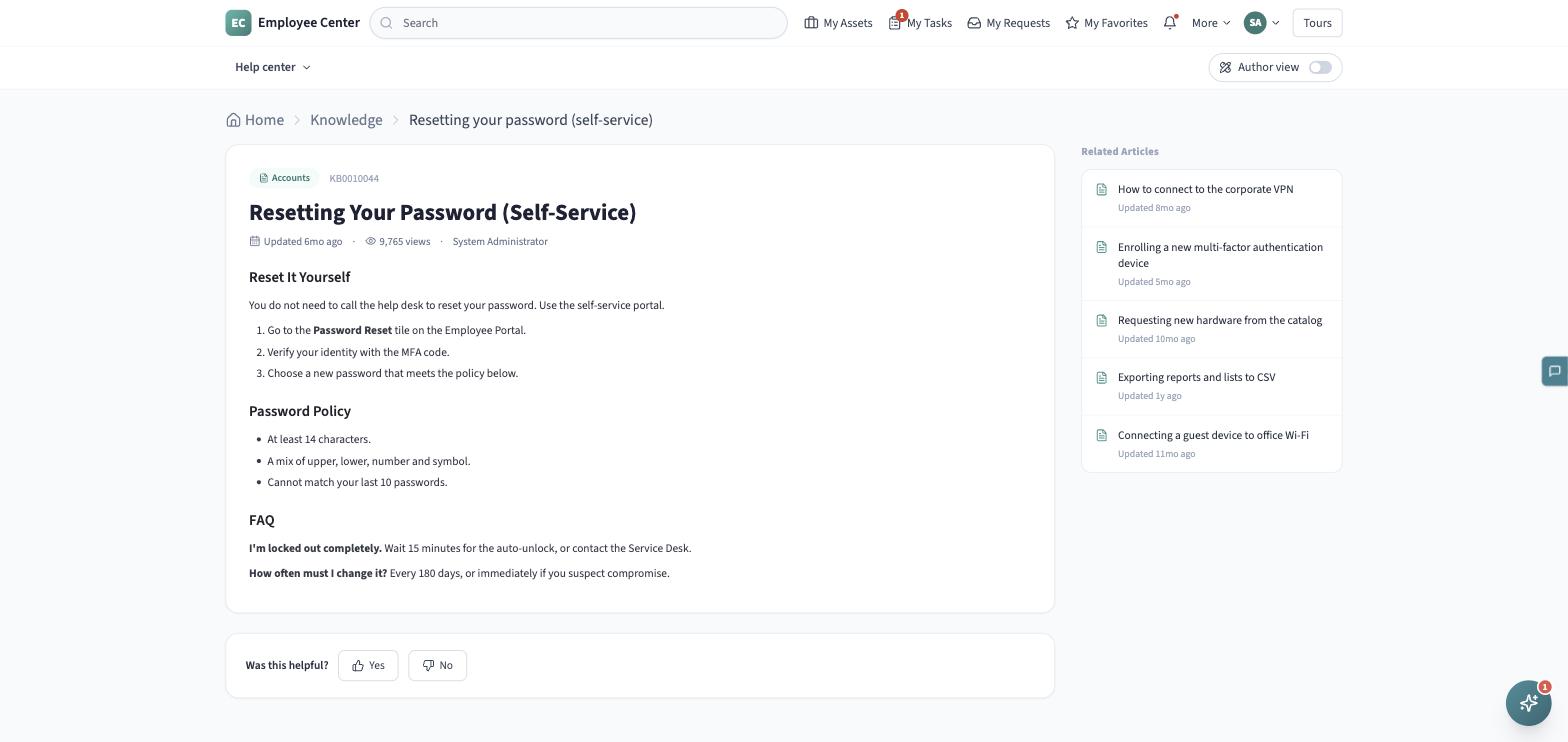
- Open Knowledge from the Help center menu, or search from the home page.
- An article shows a category chip and number, the title with a meta line (last updated, views, author), the full body, and a Related articles panel.
- Use the Yes/No buttons at the bottom to answer “Was this helpful?”
See Knowledge for browsing by category and leaving richer feedback.
6. Approvals
Section titled “6. Approvals”If you’re a manager or designated approver, items awaiting your decision show up in My Approvals as cards — what’s being requested, who for, when, and the amount if it has a cost. Click Approve or Reject on a pending card; your decision takes effect immediately. Switch to Recent decisions to review what you’ve already acted on. See Approvals for the full walk-through.