Signing in and navigation
1. Sign in
Section titled “1. Sign in”- Open the sign-in page and enter the email and password your organization gave you.
- If your organization uses single sign-on, use the Google, Microsoft, Apple, or organization SSO button instead of a password — you’re sent back to RezolveIT once you’re authenticated.
- Prefer not to type a password? Switch to the email code tab and RezolveIT sends a one-time code to your inbox to sign in with instead.
Where you land after signing in depends on your role: employees land in the Employee Center (covered in Employee essentials); agents, fulfillers, and administrators land on a launchpad’s home dashboard. The rest of this page covers the launchpad top bar — the navigation frame every agent and administrator works inside all day.
2. The top bar
Section titled “2. The top bar”Across the top of every launchpad you’ll find, left to right:
- The brand mark, which returns you to your current launchpad’s home.
- Four menus: Launchpads, Favorites, History, and Browse.
- A center pill showing the launchpad you’re currently in, with a star to favorite the current page.
- A global search box.
- A right-hand cluster of utility icons: AI Assist, Conversations, Usage Analytics, Page insights, Help, Notifications, Language, and your avatar.
Switching launchpads
Section titled “Switching launchpads”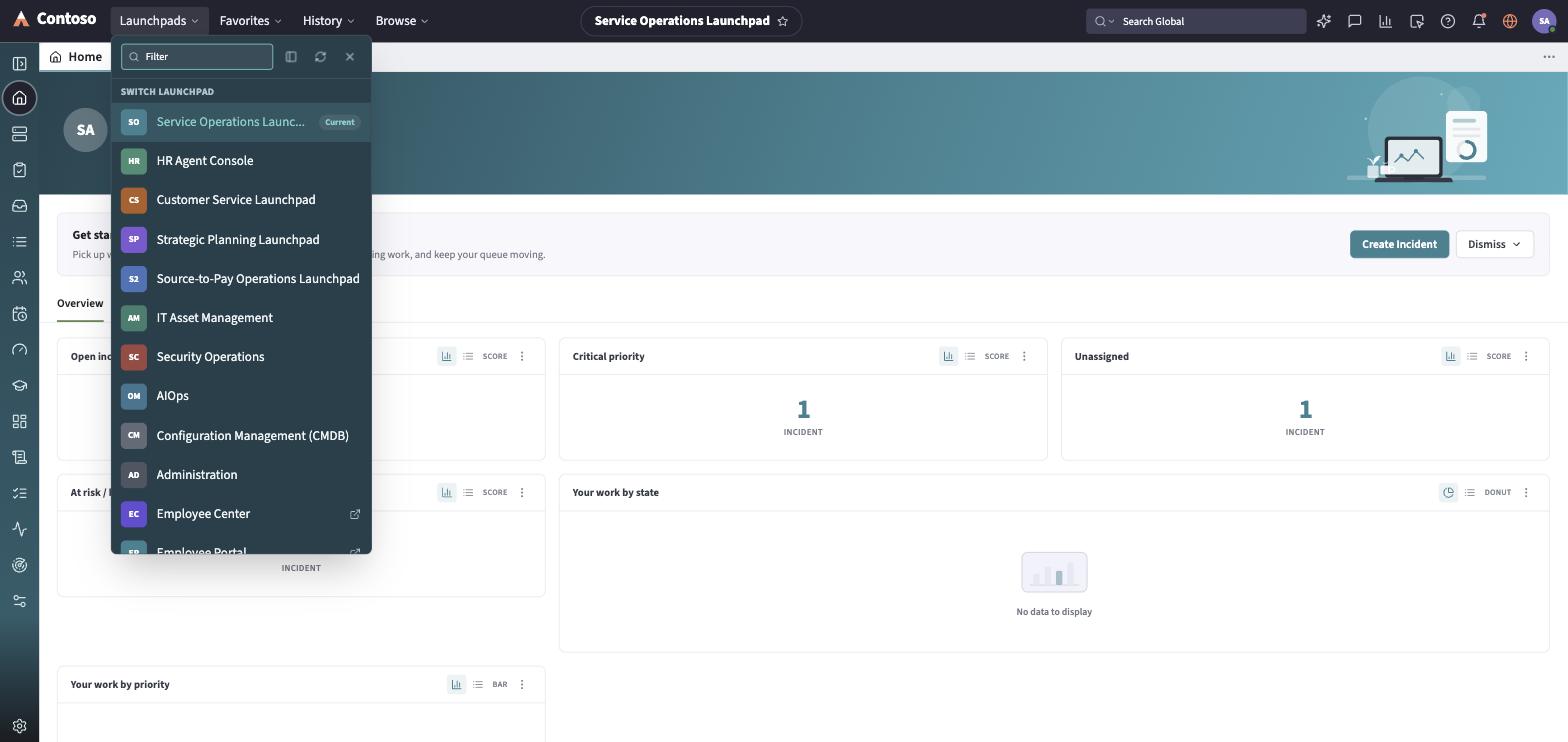
- Click Launchpads at the start of the top bar.
- Type to filter the list, or scroll to find the one you need. The launchpad you’re currently in is marked Current.
- Click one to switch — the icon rail, the home dashboard, and the available lists all change to match. RezolveIT groups work into launchpads including Service Operations, HR Agent Console, Customer Service, Strategic Planning, Source-to-Pay Operations, IT Asset Management, Security Operations, AIOps, Configuration Management DB, and Administration.
The Employee Center and Employee Portal also appear in this switcher, but they’re end-user destinations rather than agent launchpads — selecting one opens it in a new browser tab instead of switching your current launchpad.
Search, Favorites, History, and Browse
Section titled “Search, Favorites, History, and Browse”- Search — the box at the center-right of the bar; start typing and a panel of matching records and destinations opens beneath it.
- Favorites — pages and records you’ve starred, reachable from the star on the center pill or the Favorites menu.
- History — your recently visited pages, in case you need to backtrack.
- Browse — an application navigator for jumping straight to any module.
Notifications
Section titled “Notifications”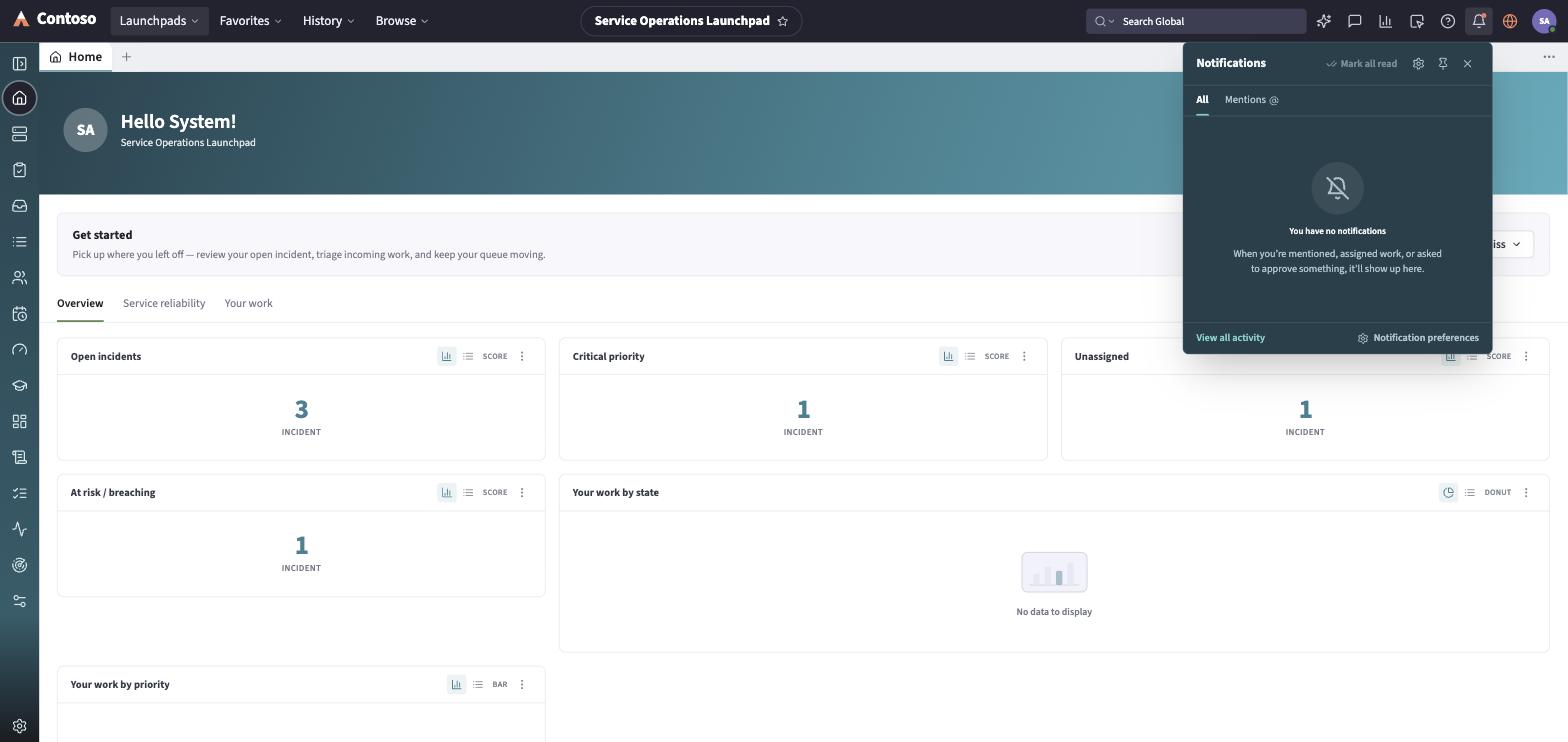
Click the bell to open your notifications. The panel opens on the All tab; switch to Mentions to see only notifications where someone tagged you. Click a notification to jump to what it’s about, use the checkmark to mark one read (or the double-check to mark all read), or dismiss one with its X. The gear icon in the panel header opens your notification preferences directly.
Language
Section titled “Language”Click the globe icon to open the language menu. Each available language is listed with its native name; the one you’re using shows a checkmark. Selecting a different language switches the interface immediately — choosing Hebrew also flips the whole layout to right-to-left. A Language & Region link at the bottom of the menu opens the fuller settings tab, covered in Personalization.
The avatar menu
Section titled “The avatar menu”Click your avatar at the far end of the bar to open your account menu:
- A presence pill at the top (Available, Busy, Away, or Do not disturb) you can change with one click.
- Profile — your editable self-service record (name, phone numbers, title, email, date format, time zone).
- Preferences — opens the full Preferences panel covered in Personalization.
- Out of office — mark yourself away for a date range.
- For administrators: Impersonate user (sign in as someone else to see what they see) and Elevate role (temporarily assume an elevated security role).
- Configure launchpad and Configure page — personalize the current launchpad’s layout or the current page.
- Log out.
Click the ? icon for the Help menu: What’s new (recent announcements), Documentation (opens this documentation site in a new tab), Keyboard shortcuts (a reference of every shortcut, also opened with the shortcut itself), and Community.